Why Is My Braised Chicken Tough? Causes, Fixes, and Tips for Perfectly Tender Results

Part 1: Understanding the Problem

Introduction

Have you ever prepared a braised chicken dish, eagerly anticipating tender, juicy meat, only to end up with something tough and unappealing? It’s a frustrating experience, especially when you’ve followed the recipe to the letter. This common cooking mishap leaves many home cooks wondering, “Why is my braised chicken tough?” Understanding the answer to this question is the first step toward ensuring perfectly tender chicken every time.

Braising is a timeless cooking technique, celebrated for its ability to turn even the toughest cuts of meat into succulent, flavorful dishes. However, achieving this requires mastering a delicate balance of factors, including cooking time, temperature, and the right cuts of chicken. A small mistake in any of these areas can lead to dry, rubbery, or chewy chicken instead of the rich, tender texture braising promises.

In this article, we’ll explore the science behind braising, the most common reasons chicken turns out tough, and practical steps to avoid these issues. By the end, you’ll have the knowledge and techniques to create deliciously tender braised chicken dishes that never disappoint. Let’s dive into the details and uncover the secrets to mastering this classic cooking method!

Common Causes of Tough Braised Chicken

When braised chicken turns out tough, it’s often due to issues with technique or timing. Braising, a slow-cooking method that relies on moist heat, transforms meat into tender perfection when done correctly. However, even small mistakes can lead to chewy or rubbery results. Let’s explore the common culprits behind this problem and how to avoid them.

Insufficient Cooking Time

One of the most common reasons for tough braised chicken is not cooking it long enough. Braising requires patience because it depends on breaking down the connective tissues in the meat. Cuts like thighs and drumsticks are rich in collagen, which needs time to convert into gelatin, a process that makes the meat tender and moist. If you stop cooking too soon, the connective tissues remain tough, resulting in chewy chicken. To avoid this, ensure your chicken simmers gently for the recommended time—usually 1 to 2 hours, depending on the recipe.

Overcooking the Chicken

While undercooking is problematic, overcooking can be equally detrimental. Leaving chicken on the heat for too long can cause the meat to dry out, leading to a stringy or rubbery texture. This is especially true for leaner cuts like chicken breasts, which are less forgiving. Keep an eye on your cooking time and test for doneness periodically to prevent overcooking.

Inadequate Liquid or Improper Technique

Braising relies on liquid to create a moist cooking environment. If there isn’t enough liquid to cover or partially submerge the chicken, it may cook unevenly, with some parts becoming dry and tough. Additionally, boiling instead of simmering can tighten the meat’s fibers, making it less tender. Always maintain a gentle simmer to ensure even cooking and allow the flavors to meld.

By addressing these issues, you can avoid tough braised chicken and achieve the tender, flavorful results this method promises.

Choosing the Right Cut of Chicken for Braising

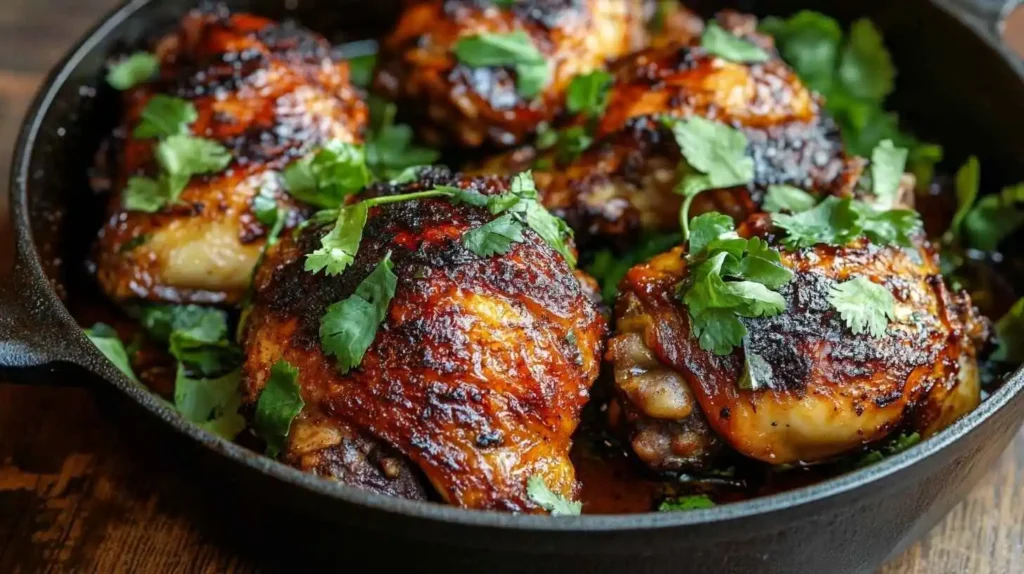
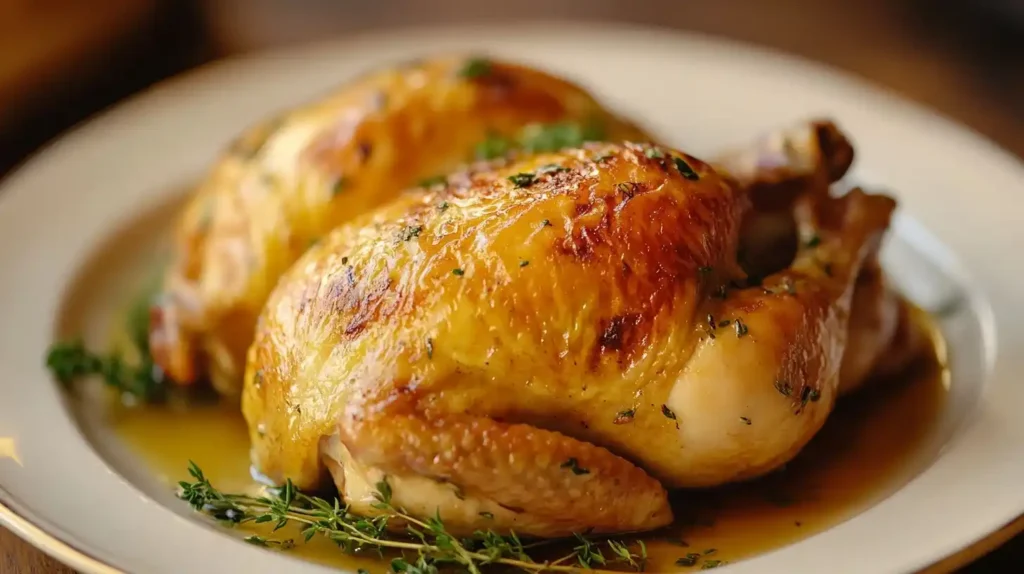
Tender braised chicken in a sauce with herbs and vegetables

Selecting the appropriate cut of chicken is crucial to achieving tender, flavorful results when braising. Not all cuts are created equal, and choosing the wrong one can lead to dry or tough meat, even with perfect technique. Understanding the differences between chicken cuts will help you make the best choice for this slow-cooking method.

Bone-In vs. Boneless Cuts

Bone-in cuts, such as thighs, drumsticks, or whole legs, are the gold standard for braising. The bones not only help retain moisture during cooking but also add depth to the flavor of the dish. As the chicken cooks, marrow and collagen from the bones enrich the braising liquid, creating a more savory and complex sauce. On the other hand, boneless cuts, particularly chicken breasts, tend to dry out faster due to their lower fat content. If you prefer using boneless pieces, adjust the cooking time to prevent overcooking.

Dark Meat vs. White Meat

Dark meat, like thighs and drumsticks, is ideal for braising because it contains more fat and connective tissue. During the slow cooking process, these tissues break down, resulting in moist, tender meat that absorbs the flavors of the braising liquid. White meat, such as chicken breasts, lacks this connective tissue, making it more prone to drying out. For braising success, opt for cuts that can withstand the extended cooking time without losing their texture.

By selecting the right cut of chicken, you set the foundation for a braised dish that is not only tender and juicy but also bursting with flavor.

How Temperature Affects Texture

Temperature plays a pivotal role in determining whether your braised chicken turns out tender and juicy or tough and dry. Properly controlling the heat during the cooking process ensures that the meat’s connective tissues break down while retaining its natural moisture and flavor.

The Role of Low Heat in Tenderizing Chicken

Braising is a slow-cooking method designed to tenderize tougher cuts of meat. It works best at low, consistent temperatures, typically between 180°F (82°C) and 200°F (93°C). At these temperatures, the collagen in the chicken’s connective tissues slowly transforms into gelatin, which helps create a rich and moist texture. Cooking too quickly or at higher temperatures can disrupt this process, preventing the chicken from becoming tender. For best results, maintain a gentle simmer rather than a rapid boil.

Avoiding High-Heat Mistakes

High heat is one of the most common causes of tough braised chicken. Boiling the liquid too aggressively causes the chicken’s proteins to contract and tighten, resulting in a chewy, rubbery texture. It can also evaporate the braising liquid too quickly, leaving the meat dry. To prevent this, use a low flame or an oven set to a moderate temperature, ensuring the braising liquid gently bubbles around the meat.

By carefully managing the temperature, you allow the chicken to cook evenly and absorb the flavors of the braising liquid, leading to a dish that is tender, juicy, and full of flavor. Temperature control is the cornerstone of successful braising.

Part 2: Fixing and Preventing Tough Braised Chicken

Tender braised chicken in a sauce with herbs and vegetables

Proven Techniques for Tender Braised Chicken

Achieving perfectly tender braised chicken involves combining thoughtful preparation, precise cooking techniques, and the right ingredients. By following these proven methods, you can ensure your chicken is always moist, tender, and full of flavor.

Marinating Before Braising

Marinating chicken before braising can significantly enhance its tenderness and flavor. Acidic ingredients like vinegar, lemon juice, or yogurt help break down proteins in the meat, making it more tender. For best results, include complementary aromatics such as garlic, herbs, or spices in the marinade. Allow the chicken to marinate for at least two hours—or overnight for deeper flavor—before beginning the braising process.

Proper Browning Techniques

Browning the chicken before braising creates a flavorful crust and enhances the dish’s overall taste. To achieve this:

  • Pat the chicken dry with a paper towel to remove moisture.
  • Heat oil in a heavy-bottomed pan until shimmering.
  • Sear the chicken until golden-brown on all sides, avoiding overcrowding the pan. This step adds depth to the dish while also locking in moisture, preparing the meat for the slow cooking process.

Using the Right Cooking Liquid

The choice of braising liquid is crucial for both tenderness and flavor. Options like chicken broth, wine, or tomato-based sauces work well. Make sure the liquid covers about two-thirds of the chicken to create a moist cooking environment. Incorporate aromatics such as onions, garlic, and fresh herbs for a more complex flavor profile.

Maintaining a gentle simmer throughout the cooking process ensures the chicken absorbs the liquid while cooking evenly. Avoid boiling, which can lead to tough meat. By mastering these techniques, you’ll consistently produce braised chicken that is tender, juicy, and delicious.

Step-by-Step Troubleshooting for Tough Chicken

Tender braised chicken in a sauce with herbs and vegetables

Even the most experienced cooks can end up with tough braised chicken. Fortunately, there are ways to salvage the dish and ensure it doesn’t happen again. Here’s a step-by-step guide to troubleshooting tough chicken:

Step 1: Assess the Cooking Time

Tough chicken often results from insufficient cooking time. If the chicken is chewy, it likely needs more time for the connective tissues to break down. Return the chicken to the braising liquid and simmer it gently for another 20–30 minutes, checking periodically for tenderness.

Step 2: Adjust the Liquid

If the chicken feels dry or unevenly cooked, there may not be enough liquid in the pot. Add more broth, water, or wine to the braising dish. Ensure the liquid level covers at least two-thirds of the chicken to create a steamy, moist environment that rehydrates the meat.

Step 3: Lower the Heat

If the chicken turned out rubbery or stringy, the heat was likely too high. High heat causes the proteins in the chicken to tighten, making the meat tough. Reduce the heat to a low simmer and allow the chicken to cook slowly and evenly.

Step 4: Rehydrate Overcooked Chicken

If the chicken is already overcooked, shred it and let it soak in the braising liquid. This will help the meat absorb moisture and flavors. Adding a splash of cream or additional broth can also enrich the sauce, improving the overall texture.

By following these steps, you can salvage tough braised chicken and avoid similar issues in future cooking. Proper adjustments and patience make all the difference in turning a mistake into a satisfying meal.

Recipes and Tips from Expert Chefs

Mastering braised chicken is an art that chefs worldwide excel at. They rely on time-tested techniques and creative flavor combinations to ensure tender, flavorful results. Here are some chef-inspired recipes and tips to elevate your braising game:

Coq au Vin: A Classic French Braised Chicken Dish

Coq au Vin is a quintessential example of how braising transforms humble ingredients into a gourmet meal. This recipe highlights the importance of slow cooking to build complex flavors.

Ingredients:

  • Bone-in chicken thighs
  • Red wine
  • Chicken stock
  • Onions, garlic, and mushrooms
  • Fresh thyme and bay leaves

Instructions:

  1. Brown the chicken in a heavy pot and set it aside.
  2. Sauté onions, garlic, and mushrooms in the same pot until softened.
  3. Deglaze the pan with red wine, scraping up browned bits to add flavor.
  4. Return the chicken to the pot, add stock and herbs, and simmer gently for 1.5–2 hours.
  5. Serve with crusty bread or over mashed potatoes.

Tips from Expert Chefs

  • Layer Flavors: Sauté vegetables, deglaze with wine or vinegar, and incorporate fresh herbs to build depth.
  • Low and Slow is Key: Maintain a steady simmer for tender results.
  • Use Dark Meat: Cuts like thighs and drumsticks retain moisture and develop richer flavors during braising.

These chef-approved methods and recipes demonstrate the versatility and elegance of braised chicken, ensuring delicious results every time.

FAQs Section

Tender braised chicken in a sauce with herbs and vegetables

Why does my chicken feel rubbery after braising?

Rubbery chicken often results from cooking at too high a temperature or not allowing enough time for the connective tissues to break down. Maintaining a low simmer prevents this issue.

Should I add salt while braising chicken?

Yes, adding salt during braising helps season the meat and enhances the overall flavor. Be cautious if your braising liquid contains salty ingredients like soy sauce or broth.

What’s the best temperature to braise chicken?

Keep the liquid at a steady 180°F (82°C) to 200°F (93°C) for optimal tenderness.

Can I braise chicken in a slow cooker?

Absolutely! Slow cookers work well for braising. Cook on low for 4–6 hours or until the chicken is tender.

Conclusion

Braising is a timeless cooking technique that transforms chicken into a tender, flavorful centerpiece for any meal. However, tough braised chicken can frustrate even the most seasoned cooks. By understanding the common causes of toughness—like insufficient cooking time, overcooking, or improper liquid levels—you can avoid these pitfalls and ensure your chicken turns out perfectly every time.

The key lies in preparation and technique. Choosing the right cut, such as bone-in thighs or drumsticks, sets the stage for success. Proper browning, maintaining a gentle simmer, and using a well-seasoned liquid all contribute to a dish that’s rich in flavor and texture. If things don’t go as planned, troubleshooting strategies like rehydrating chicken or adjusting the heat and liquid levels can help salvage the dish.

Braising is about patience and attention to detail, but the results are worth the effort. With these tips and techniques, you’ll no longer have to ask, “Why is my braised chicken tough?” Instead, you’ll be serving dishes that are tender, juicy, and packed with flavor. Embrace the art of braising, and enjoy the satisfaction of mastering a classic cooking method that turns simple ingredients into culinary masterpieces.

Internal Linking Opportunities

  1. “flavorful braised dishes”
    Braised Chicken with Harissa and Olives Recipe

    • This link complements the discussion about using well-flavored liquids and the benefits of braising techniques.
  2. “effects of braising techniques”
    What Does Braising Do to Chicken?

    • This is a relevant resource for readers who want to understand the scientific and culinary benefits of braising.
  3. “enhancing chicken dishes with flavors”
    Creamy Mushroom and Spinach Stuffed Chicken Recipe

    • Useful for readers looking for additional methods to elevate chicken dishes with complementary flavors.

2 thoughts on “Why Is My Braised Chicken Tough? Causes, Fixes, and Tips for Perfectly Tender Results”

Leave a Comment